Learning shaders from scratch

Why on earth did I want to do this?

One day, looking for inspiration to create new games, I came across a game called A Short Hike and its art style really stuck with me. It's a 3D world with a pixelated shader on top and I thought: WOW, what is this? How is it made? So I started researching.

The only shaders I knew were Minecraft shaders, which most people know as a way to modify Minecraft to add visual effects — usually realistic ones, though there are others that go in different directions.

While researching I discovered what became my shader bible: The Book of Shaders by Patricio Gonzalez Vivo and Jen Lowe. Then I asked myself: what artistic style would be interesting in a video game? That's when the idea of imitating Claude Monet came to me.

When I was a kid, my parents bought art magazines that came with the newspaper. One of them was about Monet. I was completely fascinated by his work, which is why I chose him over any other style.
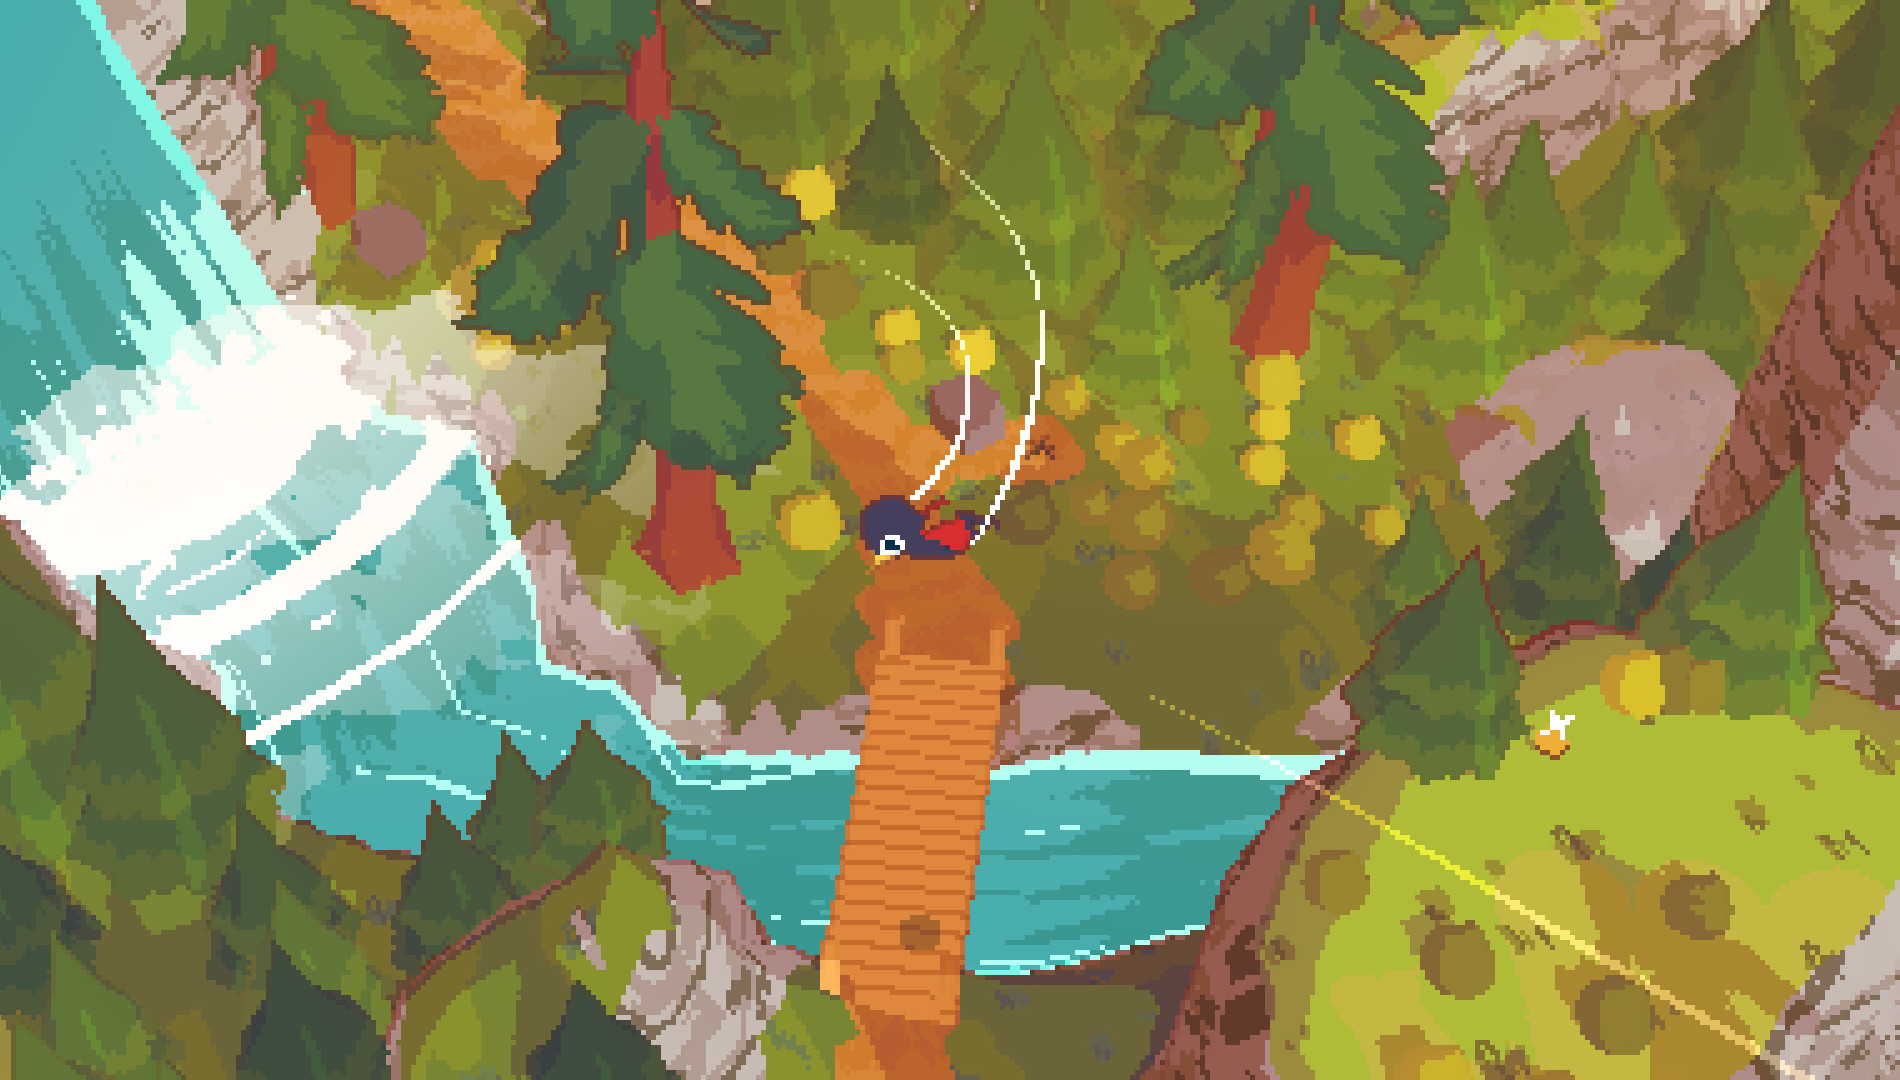
A Short Hike
A Short Hike — visual inspiration

Before the code, the paintings.

The first thing I noticed in Monet's paintings were the water reflections in Bathers at La Grenouillère. They're beautiful. The way he could capture people with so few brush strokes is remarkable.
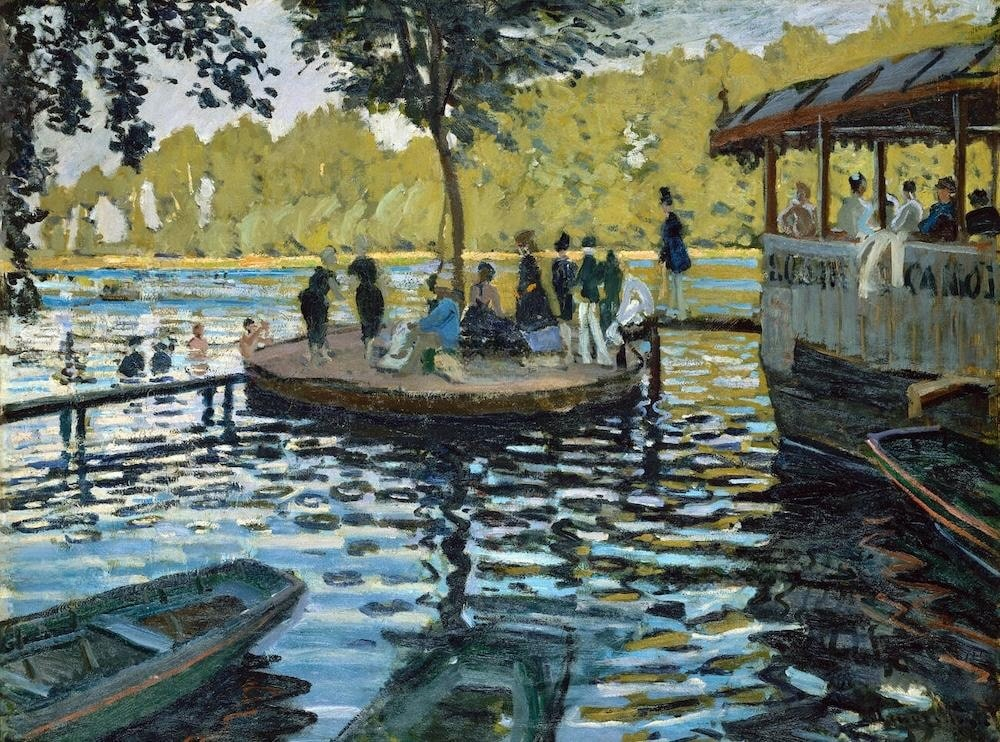
La Grenouillère
La Grenouillère, 1869 — Claude Monet

Another thing I found fascinating was the way Monet paints clouds. These elements absolutely had to make it into the game.
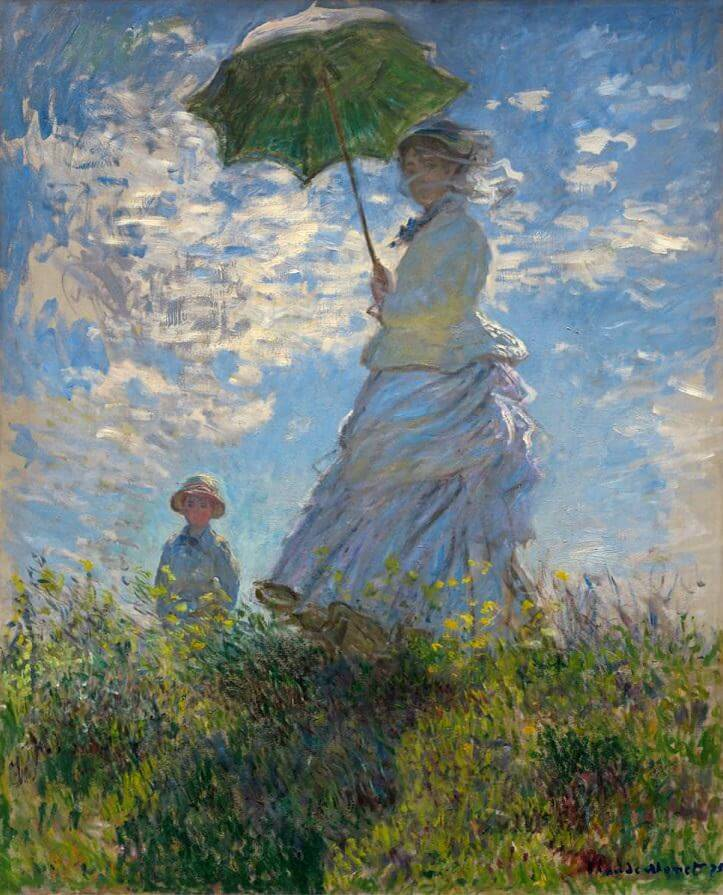
Woman with a Parasol
Woman with a Parasol — Madame Monet and Her Son, 1875 — Claude Monet

My first shader was a blue rectangle.

My first experience coding shaders (GLSL) was on thebookofshaders.com. The "Hello World" looked something like this:

#ifdef GL_ES precision mediump float; #endif uniform float u_time; void main() { gl_FragColor = vec4(1.0, 0.0, 1.0, 1.0); }

This script paints every pixel of the object with a solid color. You can run it on shadertoy.com, a GLSL visualizer.

Learning from the book, I ran into a lot of advanced math I had to study. Things finally clicked when I managed to animate a red-to-black gradient using the sine function over time to smoothly oscillate values between 0 and 1.

By far the most confusing part was when we started using matrices in GLSL. I really should have paid more attention in class, lol. (bait)

The Kuwahara filter, or how to paint without painting.

The Kuwahara filter smooths uniform areas without destroying edges. For each pixel it follows 4 steps:

1. Look at a square region around the pixel.
2. Divide that square into 4 quadrants.
3. Find which quadrant is most "uniform" (most similar colors).
4. Pick that quadrant and use its average color.

This algorithm helps transform any image into something resembling a Monet painting, because it mimics how the human eye simplifies a scene — not just how a photo looks. Impressionist painting is precisely that: controlled simplification.

Here's the final code for Shadertoy:

#define KERNEL_SIZE 5 #define VIBRATION 0.04 #define BLOOM_STRENGTH 0.15 void mainImage(out vec4 fragColor, in vec2 fragCoord) { vec2 uv = fragCoord / iResolution.xy; vec2 texel = 1.0 / iResolution.xy; float n = float((KERNEL_SIZE + 1) * (KERNEL_SIZE + 1)); vec3 mean[4]; vec3 sigma[4]; for (int k = 0; k < 4; k++) { mean[k] = vec3(0.0); sigma[k] = vec3(0.0); } // Quadrant 0 for (int j = -KERNEL_SIZE; j <= 0; j++) for (int i = -KERNEL_SIZE; i <= 0; i++) { vec3 c = texture(iChannel0, uv + vec2(float(i), float(j)) * texel).rgb; mean[0] += c; sigma[0] += c * c; } // Quadrant 1 for (int j = -KERNEL_SIZE; j <= 0; j++) for (int i = 0; i <= KERNEL_SIZE; i++) { vec3 c = texture(iChannel0, uv + vec2(float(i), float(j)) * texel).rgb; mean[1] += c; sigma[1] += c * c; } // Quadrant 2 for (int j = 0; j <= KERNEL_SIZE; j++) for (int i = -KERNEL_SIZE; i <= 0; i++) { vec3 c = texture(iChannel0, uv + vec2(float(i), float(j)) * texel).rgb; mean[2] += c; sigma[2] += c * c; } // Quadrant 3 for (int j = 0; j <= KERNEL_SIZE; j++) for (int i = 0; i <= KERNEL_SIZE; i++) { vec3 c = texture(iChannel0, uv + vec2(float(i), float(j)) * texel).rgb; mean[3] += c; sigma[3] += c * c; } float min_sigma = 1e8; vec3 result = vec3(0.0); for (int k = 0; k < 4; k++) { mean[k] /= n; vec3 s = abs(sigma[k] / n - mean[k] * mean[k]); float val = s.x + s.y + s.z; if (val < min_sigma) { min_sigma = val; result = mean[k]; } } // Color vibration vec2 noiseUV = uv * iResolution.xy * 0.8; float noise = fract(sin(dot(noiseUV, vec2(12.9898, 78.233))) * 43758.5453); noise = noise * 2.0 - 1.0; result += noise * VIBRATION; // Simple bloom vec3 bloom = vec3(0.0); float samples = 0.0; for (float bj = -3.0; bj <= 3.0; bj++) for (float bi = -3.0; bi <= 3.0; bi++) { vec2 offset = vec2(bi, bj) * texel * 4.0; vec3 s = texture(iChannel0, uv + offset).rgb; float b = dot(s, vec3(0.299, 0.587, 0.114)); bloom += s * smoothstep(0.6, 1.0, b); samples += 1.0; } bloom /= samples; result += bloom * BLOOM_STRENGTH; fragColor = vec4(result, 1.0); }
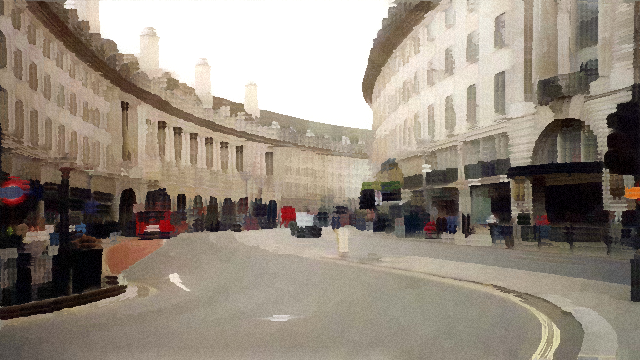
Result in Shadertoy
Result in Shadertoy
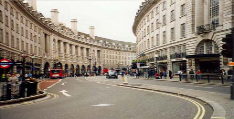
Original image
Original

Color vibration and a little bloom.

Kuwahara alone wasn't enough — it only simplifies and smooths colors. It doesn't add texture, brushstroke direction, or natural irregularity. It reduces detail but doesn't introduce gesture or visual energy. The result looked like a filtered photo, not a real painting.

So I added a tiny bit of static noise to each pixel:

// Color vibration — static noise per pixel vec2 noiseUV = fragCoord * 0.8; float noise = fract(sin(dot(noiseUV, vec2(12.9898, 78.233))) * 43758.5453); noise = noise * 2.0 - 1.0; float vibration = 0.04; result += noise * vibration;

What does this noise do and why does it work?
Kuwahara smooths so much that everything can look flat and artificial. The noise introduces micro-variations, like the grain of paint on canvas.

Porting to Godot was easier than expected.

The main differences between Godot shaders and raw GLSL (Shadertoy) are:

GDShader (Godot)
Integrates into the Godot engine · Has built-in variables (SCREEN_UV, COLOR, etc.) · Works inside the engine pipeline · More practical for games

ShaderToy (GLSL)
Almost pure GLSL · Uses mainImage, iResolution, iChannel0 · More experimental · Ideal for prototypes and visual effects

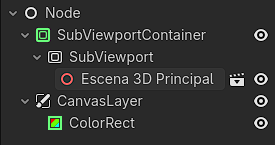
With this scene structure and a sample 3D world, we got the shader running in real time.

Godot scene structure
The scene structure

I learned to write shaders. And other things.

After going through all this and discovering that you can create real art with mathematics, the way I see the world changed.

Now comes the next challenge: trying to build an actual game with all of this, and see if I can make something beautiful.

I wanted an impressionist filter. I ended up learning to see light.

Learning shaders from scratch

¿Por qué rayos quería hacer esto?

Un día buscando inspiración para crear nuevos juegos vi este juego que se llama A Short Hike y me dejó muy marcado su arte. Es un mundo 3D pero con un shader pixelado encima y dije: WOW ¿qué es esto? ¿cómo se hace? y me puse a investigar.

Los únicos shaders que conocía eran los de Minecraft, que para la mayoría de gente es una forma de modificar Minecraft para que tenga efectos visuales generalmente de realismo en el juego, aunque también hay otros que tienen otros efectos que no son necesariamente realistas.

Entonces investigando descubrí la biblia de los shaders (por lo menos para mí), The Book of Shaders de Patricio Gonzalez Vivo y Jen Lowe, que fue mi principal guía para aprender. Me puse a pensar: ¿qué estilo artístico sería interesante ver en un videojuego? Y ahí es donde se me ocurrió imitar a Claude Monet.

Cuando pequeño mis padres compraron unas revistas de pintores que venían en el diario y una de esas era de Monet. Quedé muy fascinado con su arte y por eso lo elegí a él y no a otro estilo.

A Short Hike
A Short Hike — adamgryu

Antes del código, las pinturas.

Lo primero que noté en las pinturas de Monet fueron los reflejos del agua en Bathers at La Grenouillère. Son muy bonitos. La manera en que puede dibujar personas en tan pocos trazos es genial.

La Grenouillère
La Grenouillère, 1869 — Claude Monet

Otra cosa que noté interesante es la forma en la que Monet dibuja las nubes. Estas cosas sí o sí deben estar en el videojuego.

Woman with a Parasol
Woman with a Parasol — Madame Monet and Her Son, 1875 — Claude Monet

Mi primer shader era un rectángulo azul.

Mi primera experiencia programando en shaders (GLSL) fue en thebookofshaders.com. El "Hola Mundo" se veía algo así:

#ifdef GL_ES precision mediump float; #endif uniform float u_time; void main() { gl_FragColor = vec4(1.0, 0.0, 1.0, 1.0); }

Este script pinta todos los píxeles del objeto con un color sólido. Puedes ejecutar este script en shadertoy.com, que es un visualizador GLSL.

Aprendiendo en el libro de shaders me encontré con mucha matemática avanzada que tuve que estudiar. Sentí que por fin algo funcionó cuando logré hacer una animación de un gradiente de rojo a negro utilizando la función seno sobre el tiempo para que devuelva valores de 0 a 1 suavemente y así disminuir y aumentar la cantidad de rojo en la imagen.

Definitivamente lo más confuso fue cuando empezamos a usar matrices en GLSL. Me hubiera ayudado haber prestado atención en clases jajaja. (bait)

El Kuwahara filter, o cómo pintar sin pintar.

El filtro Kuwahara suaviza áreas uniformes sin destruir bordes. Para cada píxel sigue 4 pasos:

1. Mira un cuadrado alrededor de ese punto.
2. Divide ese cuadrado en 4 partes.
3. Observa cuál de esas partes es más "uniforme" (más parecida entre sí).
4. Elige esa parte y usa su color promedio.

Este algoritmo nos ayuda a transformar una imagen cualquiera a algo parecido a los cuadros de Monet, porque copia cómo simplifica el ojo humano una escena. No solo cómo se ve una foto. La pintura impresionista es precisamente eso: simplificación controlada.

Este es el código final para Shadertoy:

#define KERNEL_SIZE 5 #define VIBRATION 0.04 #define BLOOM_STRENGTH 0.15 void mainImage(out vec4 fragColor, in vec2 fragCoord) { vec2 uv = fragCoord / iResolution.xy; vec2 texel = 1.0 / iResolution.xy; float n = float((KERNEL_SIZE + 1) * (KERNEL_SIZE + 1)); vec3 mean[4]; vec3 sigma[4]; for (int k = 0; k < 4; k++) { mean[k] = vec3(0.0); sigma[k] = vec3(0.0); } // Cuadrante 0 for (int j = -KERNEL_SIZE; j <= 0; j++) for (int i = -KERNEL_SIZE; i <= 0; i++) { vec3 c = texture(iChannel0, uv + vec2(float(i), float(j)) * texel).rgb; mean[0] += c; sigma[0] += c * c; } // Cuadrante 1 for (int j = -KERNEL_SIZE; j <= 0; j++) for (int i = 0; i <= KERNEL_SIZE; i++) { vec3 c = texture(iChannel0, uv + vec2(float(i), float(j)) * texel).rgb; mean[1] += c; sigma[1] += c * c; } // Cuadrante 2 for (int j = 0; j <= KERNEL_SIZE; j++) for (int i = -KERNEL_SIZE; i <= 0; i++) { vec3 c = texture(iChannel0, uv + vec2(float(i), float(j)) * texel).rgb; mean[2] += c; sigma[2] += c * c; } // Cuadrante 3 for (int j = 0; j <= KERNEL_SIZE; j++) for (int i = 0; i <= KERNEL_SIZE; i++) { vec3 c = texture(iChannel0, uv + vec2(float(i), float(j)) * texel).rgb; mean[3] += c; sigma[3] += c * c; } float min_sigma = 1e8; vec3 result = vec3(0.0); for (int k = 0; k < 4; k++) { mean[k] /= n; vec3 s = abs(sigma[k] / n - mean[k] * mean[k]); float val = s.x + s.y + s.z; if (val < min_sigma) { min_sigma = val; result = mean[k]; } } // Ruido tipo vibración vec2 noiseUV = uv * iResolution.xy * 0.8; float noise = fract(sin(dot(noiseUV, vec2(12.9898, 78.233))) * 43758.5453); noise = noise * 2.0 - 1.0; result += noise * VIBRATION; // Bloom simple vec3 bloom = vec3(0.0); float samples = 0.0; for (float bj = -3.0; bj <= 3.0; bj++) for (float bi = -3.0; bi <= 3.0; bi++) { vec2 offset = vec2(bi, bj) * texel * 4.0; vec3 s = texture(iChannel0, uv + offset).rgb; float b = dot(s, vec3(0.299, 0.587, 0.114)); bloom += s * smoothstep(0.6, 1.0, b); samples += 1.0; } bloom /= samples; result += bloom * BLOOM_STRENGTH; fragColor = vec4(result, 1.0); }
Resultado en Shadertoy
Imagen original
Original

Vibración de color y un poco de bloom.

El estilo Kuwahara no era suficiente porque solo simplifica y suaviza colores. No agrega textura, dirección de pincelada ni irregularidad natural. Reduce detalle, pero no introduce gesto ni energía visual. El resultado se veía como una foto filtrada, no como una pintura real.

Además a esto agregamos un poquito de ruido estático a cada píxel:

// Vibración de color — noise estático por píxel vec2 noiseUV = fragCoord * 0.8; float noise = fract(sin(dot(noiseUV, vec2(12.9898, 78.233))) * 43758.5453); noise = noise * 2.0 - 1.0; float vibration = 0.04; result += noise * vibration;

¿Qué hace este ruido y por qué funciona?
Kuwahara suaviza mucho. Eso puede hacer que todo se vea plano y artificial. El ruido introduce micro-variaciones, como el grano de la pintura.

Portarlo a Godot fue más fácil de lo esperado.

Las principales diferencias entre Godot y GLSL puro (para Shadertoy) son:

GDShader (Godot)
Se integra al motor Godot · Tiene variables propias (SCREEN_UV, COLOR, etc.) · Funciona dentro del pipeline del engine · Más práctico para juegos

ShaderToy (GLSL)
Es GLSL casi puro · Usa mainImage, iResolution, iChannel0 · Es más experimental · Ideal para prototipos y efectos visuales

Con esta estructura de escena y un mundo 3D de ejemplo logramos tener el shader funcionando en tiempo real.

Estructura de escena en Godot
La estructura de escena

Aprendí a hacer shaders. Y otras cosas.

Después de pasar por esto y aprender que se puede hacer bastante arte con matemáticas, mi forma de ver el mundo cambió.

Ahora sigue tratar de hacer un juego con esto, a ver si termino construyendo algo bonito.

Quería un filtro impresionista. Terminé aprendiendo a mirar la luz.